Classes
- 03 Feb 2024
- 3 Minutes to read
- Contributors


- Print
- DarkLight
Classes
- Updated on 03 Feb 2024
- 3 Minutes to read
- Contributors
- Print
- DarkLight
Article summary
Did you find this summary helpful?
Thank you for your feedback
This is where you will manage the set up of classes in your school for the current year and for the next year.
.png "image(15).png")
Current Year Classes
Clicking on the Add Class button will display a class for that grade level. Double-click on the class to assign a teacher and to add an optional class name.
The GIF below shows how to add a regular class, assign a teacher, and to add an optional class name.

Class Name vs Select Teacher
The class name is an optional label. It comes in handy in the following scenarios:
You hired a new teacher that is not a user in the system yet. Use the class name to enter the new teacher's name or TBD.
You want this class to include students with a specific identifier. For example, this class will be for ELL students, then enter ELL. Enter multiple identifiers separated by a comma if need be.
Some classrooms are in building A, and others are in Building B. Use the class name to differentiate them.
The same teacher is teaching an AM class and a PM class. Assign the same teacher to both classrooms, and use the Class Name to indicate which one is AM, and which is PM.
Can't find your teacher’s name in the drop down?
Make sure they have been added to the Users page, and that their role is set to teacher. Admins and Specialists won't appear in the drop down.
Can I assign two teachers to the same classroom?
The system won't allow you to assign two teachers to the same room. However, you can permission a teacher to access other students from the same grade:
On the Users screen, click on the green eye icon for those two teachers and enable their permission to view other students in the same grade level.
After they log in, they will need to navigate to the Digital Data Wall to access the other students.
Next Year Classes
After completely building out your current year classes the next step is to build out next year's classes. Scroll down to view the next year's classes build area which is located just below the current year's setup. Then click on the red Set Up Classes for Next Year button. This will make a copy of your current year set up as a starting point. Adjust the classes and teachers for the next year as needed.
The GIF below shows how to create an initial copy of your current year set up for next year.

When creating next year's classes I want to hide my teachers names to avoid bias.
Assign the teacher’s names to the classrooms, and then in Settings choose No for the Teacher Names Visible on Compose Screen option.
Since you will be hiding teachers' names, consider using the Class Name if you want to differentiate between classrooms.
Keep with Teacher placement requests.
If you don't assign teachers to your next year classes the Keep with Teacher drop down list on the student card will not list any next year teachers. It will list None.
In the event that you do assign teachers, but select to make them not visible, the Keep with Teacher placement request will be disabled.
Adding a Split Class
To add a split, or combined class, click on the down arrow in the appropriate grade level and select either a traditional split class among two grade levels or among three. See the GIF below.

Adjust Grade Levels
The grade levels displayed are based on the selections made in the Registration form. If you need to adjust this selection click on the dropdown arrow in either the Start Grade or End Grade sections, make a selection, and click the Save New Grade Levels button.

Deleting a Class
To delete a class double click on the class and select Delete Class

A Class Can't Be Deleted If Students Are in the Class
To delete a class with students you will first need to empty the class of students. This can be done in several different ways:
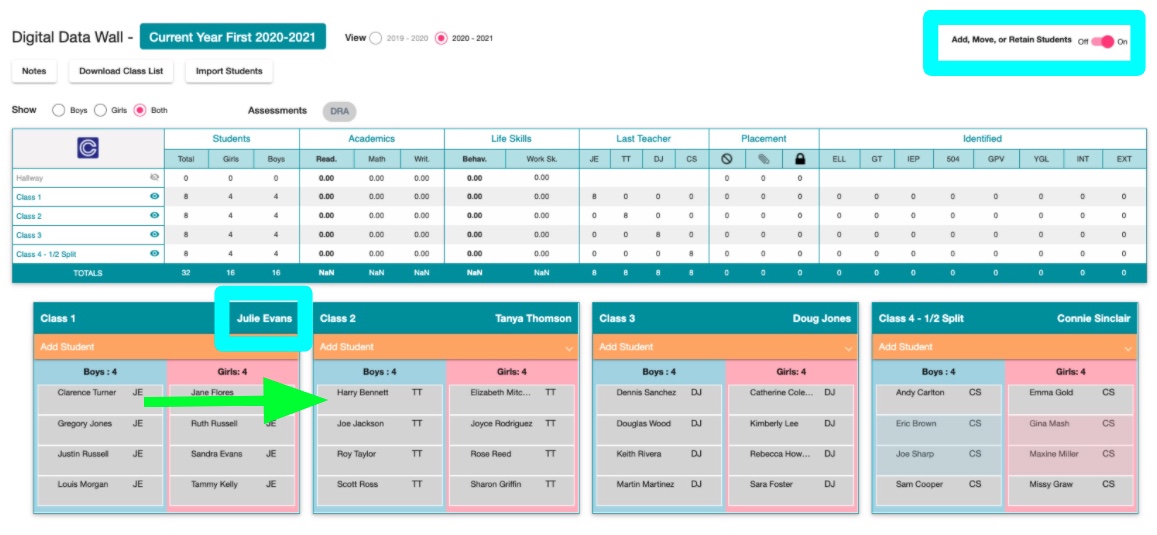
Move the students into another class directly. Go to the Digital Data Wall > turn Add, Move, or Retain Students selector to ON > move students into the other available classes.
Archive the students. Please visit this article to learn more: Archiving a Student.
Move students into the Hallway. Please visit this article to learn more: Hallway
